
I.Customized for WholewayInstallation Steps
Step 1: Electrical and plumbing modifications.The bathroom contains a significant number of electrical and plumbing fixtures. To ensure convenient future use, it is important to plan the layout effectively, such as the wiring path for the exhaust fan and whether to run water pipes through the wall. When renovating the bathroom's electrical and plumbing, the focus should be on practicality and convenience. It is advisable to plan all possible scenarios to ensure a smooth and aesthetically pleasing renovation. A well-executed electrical and plumbing renovation not only enhances convenience for future living but also has a positive impact on the bathroom's appearance.
Step 2: Waterproofing.Bathrooms are the areas in a home that use the most water, with activities such as showering, washing, and laundry all requiring water. This creates a very humid environment, making waterproofing a crucial step in bathroom renovation. The waterproofing process in a bathroom extends from the floor to the walls. To ensure effective waterproofing, the quality of the waterproofing materials and the technical aspects of their application must be guaranteed. Poor waterproofing can lead to wall moisture, detachment of the wall surface, and even water leakage, causing inconvenience to residents in the lower units. Furthermore, waterproofing is a foundational aspect of the renovation process, and discovering issues after completion requires extensive rework.
Step 3: Lay the tiles.once the waterproofing work is completed, you can lay the tiles. For bathrooms, it is recommended to choose tiles with anti-slip properties to prevent slips on wet surfaces. Tiles in bathrooms not only provide decorative function but also enhance the waterproofing of the floor and walls. Therefore, when selecting tiles, pay attention to the waterproofing performance of the tiles.
Step 4: Install the suspended ceiling.once the tiles are laid, the ceiling installation should begin. Bathrooms are prone to high humidity due to showering, so when selecting ceiling materials, it is crucial to consider their moisture resistance, waterproofing, and heat resistance. These factors will significantly impact the lifespan of the ceiling in a bathroom.
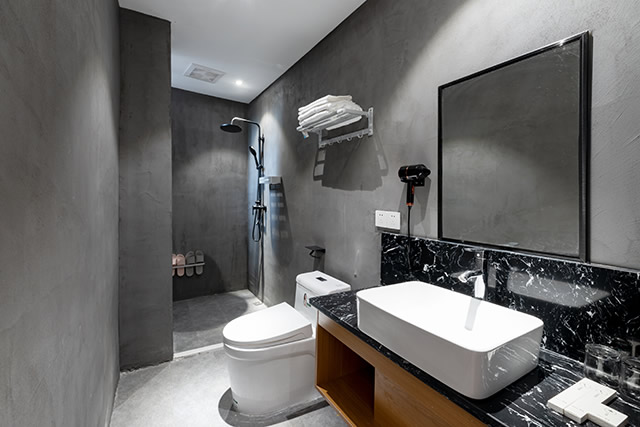
Step 5: Bathroom products,The first four steps belong to the final stage of renovation in a bathroom. The next stage involves installing bathroom fixtures. Typically, bathroom fixtures include shower cabinets, showerheads, and toilets. When installing these fixtures, it is recommended to implement a dry-wet separation design. This will make the bathroom look cleaner and more organized, and also improve space utilization.
II. Customized Bathroom Installation Process
1、Toilet installation process
Inspect the floor drain pipe → Align the pipe opening → Level and check for accuracy → Mark the position → Drill holes → Apply putty powder → Install the rubber gasket → Tighten the nuts → Mark the two side holes on the back of the water tank → Drill → Insert bolts → Tighten → Hang the water tank on the back, ensuring it is level and accurate → Tighten the nuts → Install the water tank outlet elbow → Tighten the nuts.
2、Installation process for wash basins
Insert expansion bolts → tighten → hang the sink rack → place the sink on the rack and level it → connect the drain → straighten → connect the water supply.
3、Bathtub Installation Procedure
Bathtub installation → Drain installation → Seal with putty paste → Water supply installation → Leveling and alignment.
4、Showerhead Installation Procedure
1. Smooth out the openings for cold and hot water pipes using a trowel.2. Measure the dimensions of the short sections.3. Install the sections into the pipe openings.4. Apply lead-based paint to the copper inlet of the shower fixture.5. Tighten the nuts.6. Secure the fixture to the wall.7. Install the upper copper pipe into the T-shaped opening.8. Secure the wood screws to the wall.
5、Installation process for cleaning equipment
Mix switches, cold and hot water door handles, and nuts are adjusted to be level → Install the water faucet → Install the nozzle and its core → Tighten the nuts on the cold and hot water faucet outlets → Tighten the nuts on the mixer switch → Install the three water faucet handles → Install the magnetic basin → Install the drain → Install the pull-out basket drawer.